


When performing real-time fault detection, you typically run into a trade-off: you can either sample at a high rate but face long swaths of dead time, or you can sample at a very low rate with nearly continuous data. Obviously, neither method is ideal. However, there is a way to better optimize your test rig — program the transient fault detection yourself with VHDL and customizable test equipment. Doing this allows you to detect faults in real time, in an FPGA, and even do it inside the test and validation equipment you’re already using. We know that writing FPGA code has a deserved reputation for being more challenging than more traditional procedural programming. However, the new generation of large language models, like ChatGPT, make it easy to be productive in a language without knowing it in detail.
The traditional way
Test rigs aren’t very good at transient fault detection. There are typically two approaches to monitoring and detection:
- High rate but intermittent
- Low rate but continuous
Option 1 uses an Oscilloscope. An Oscilloscope typically has a dead time between 20% and >99.9%, so relying on “seeing” a transient fault on the screen is very unlikely. One way around this is to set up a trigger to enable the Oscilloscope to do the fault detection for you and just show you the results. This method has a few drawbacks: firstly, the fault must be something that’s able to be triggered on, and secondly, it can only reliably tell you whether the fault occurred once. It can’t determine things like fault count, fault rate, total time in the fault condition, and so on.
Option 2 uses a data logger or data acquisition device. In this case, a computer monitors all the relevant signals in real time and can compute intermediate values. The system detects faults and associated parameters. However, this method also has its own set of drawbacks. This method requires a computer with an appropriate programming environment, but more importantly it can only monitor signals up to some maximum rate, limited by the power of the computer, the complexity of any calculations, and the throughput of the connection between the data acquisition device and the computer.
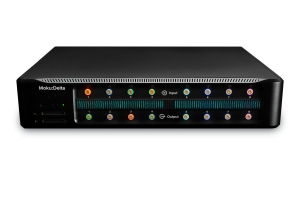
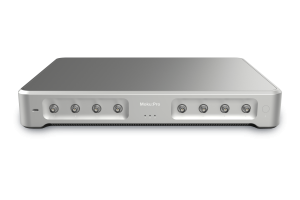
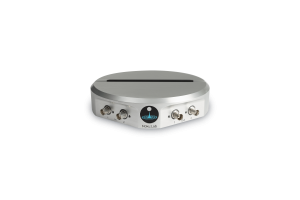
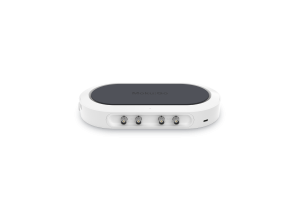
It would be desirable to combine the best of both approaches: to detect complex transient fault conditions and measure their parameters in real time without being limited to low sampling rates. Conveniently, Moku devices utilize an Instrument-on-Chip architecture and user-programmable FPGA. Along with up to 15 other instruments on a Moku device (Figure 1), Moku Cloud Compile (MCC) provides a programming environment for custom instrumentation. MCC provides all the infrastructure you need to write your own FPGA code and deploy it to your Moku.

Figure 1: Moku product lineup with iPad and desktop interfaces
Example: Transient power event detection
Let’s say your tester needs to monitor a power system for transient power events. The system is rated up to a total power, however in reality it can survive transient over-power so long as the event rate, event time, and total time in the fault condition are below a threshold. To put it another way, we want to design a test rig that’s capable of:
- Monitoring the power through a point in the system, i.e., monitor the voltage and current then compute the power.
- Count the number of times that power exceeds a threshold, if at all.
- Record the total amount of time that the power has exceeded the threshold.
We could also record the maximum duration of any one fault, the total energy in the fault conditions, and more, but we’ll limit ourselves to those three steps.
This is not a good fit for intermittent monitoring like one would perform with an Oscilloscope. It would require that the Oscilloscope trigger on power levels when the inputs to the Oscilloscope are voltage and current. Very few systems can use real time computation as input to a trigger circuit.
Depending on the system parameters, it’s also a poor fit for data acquisition approaches. Modern power systems can be damaged by high-speed transients, requiring a high acquisition rate; but a power system like this is typically designed for long-time, continuous use, so the amount of time the system needs monitoring to give confidence in its behavior may also be very long. Together, this leads to very high data volumes, increasing cost and complexity.
A custom Instrument-on-Chip deployment is a perfect fit, let’s see how we can use ChatGPT to help us build one.
ChatGPT for custom fault detection
First, ChatGPT performs best when it’s given very specific instructions. Break down large problem statements into more manageable iterations. In this way, it’s quite human!
Next, we ask for a VHDL entity that counts the number of fault events in Figure 2.

Figure 2: Prompting ChatGPT for a VHDL-based fault counter.
Next, we add the counter for the total amount of time in the fault state (Figure 3).

Figure 3: Prompting ChatGPT to add a counter to our program.
Finally, we make the fault condition threshold configurable at run-time, by adding it as a port to the VHDL entity (Figure 4). In the final MCC implementation, this threshold will be connected to a control register so it can be set without requiring the whole instrument to be rebuilt.

Figure 4: Prompting ChatGPT to modify our entity.
Find the full listing of the final VHDL at the end of this post.
Note that we have not yet tackled computing the power of the input. We can accomplish this by simply multiplying the voltage and current inputs before they go in to the VHDL entity. Figure 5 shows an example of how you might instantiate this entity in MCC, taking power as an input.

Figure 5: Computing the power of the input signal in VHDL
Note that this does increase the width of the input port from 16 to 32 bits. Either the instantiation here can throw away the low 16-bits (if the loss of precision is acceptable), or the entity updated to take a 32-bit input directly. Either way, all you need to do is ask! See the prompts at the end of this post.
Recap: Using ChatGPT and Moku Cloud Compile to perform custom transient fault detection
We had a problem requiring real-time, high-rate, deadtime-free fault detection of a computed quantity (as opposed to one that could be directly measured). After only three prompts, ChatGPT gave us all the code we needed to implement this in VHDL, a language specifically designed for high-speed data processing on FPGAs. A simple cut-and-paste operation and a little bit of glue code, and Moku Cloud Compile from Liquid Instruments turned this into a custom instrument, capable of being deployed to Moku Instrument-on-Chip. Not bad for 10 minutes’ work!
For more examples of using ChatGPT with MCC, watch our webinar here: https://liquidinstruments.com/webinar-registration-moku-cloud-compile-and-chatgpt-essential-strategies-for-testing-smarter-with-ai/
Have questions about a custom instrument you want to develop with MCC? Contact us at support@liquidinstruments.com and we’ll connect you with an engineer.
Appendix 1: Code listing

VHDL Code Snippet:
library ieee;
use ieee.std_logic_1164.all;
use ieee.numeric_std.all;

entity RisingAboveZero is
    Port (
        clk: in std_logic;
        reset: in std_logic;
        in_value: in signed(15 downto 0);
        threshold: in unsigned(15 downto 0);
        out_value: out signed(15 downto 0);
        out_cycle_count: out signed(15 downto 0)
    );
end RisingAboveZero;

architecture Behavioral of RisingAboveZero is
    signal counter: signed(15 downto 0);
    signal cycle_count: signed(21 downto 0);  -- Updated to 22 bits
    signal previous_value: signed(15 downto 0);
begin
    process(clk, reset)
    begin
        if reset = '1' then
            counter <= to_signed(0, 16);
            cycle_count <= to_signed(0, 22);  -- Updated to 22 bits
            previous_value <= to_signed(0, 16); elsif rising_edge(clk) then if in_value > signed(threshold) and previous_value <= signed(threshold) then
                counter <= counter + 1; end if; if in_value > signed(threshold) then
                cycle_count <= cycle_count + 1;
            end if;

            previous_value <= in_value;
        end if;
    end process;

    out_value <= counter;
    out_cycle_count <= cycle_count(21 downto 6);  -- Output the 16 most significant bits
end Behavioral;
Appendix 2: Port connection prompt
